Quality Control
Adopting advanced manufacturing processes, strict quality assurance measures, and compliance with industry standards Ensuring the high quality, precision, and durability of your parts and prototypes
Our Quality Policy
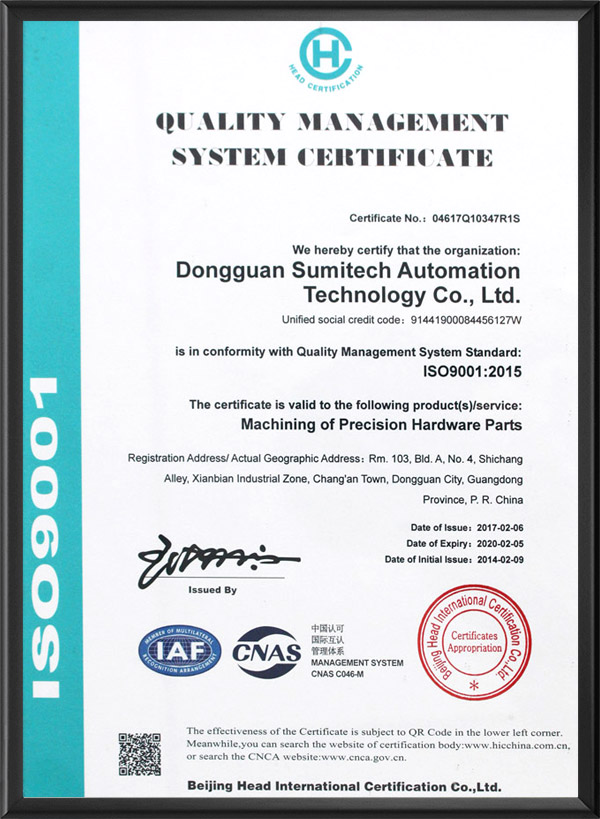
Our quality management system has been approved and certified according to the ISO 9001:2015 standard
This reflects our commitment to continuous quality improvement and customer satisfaction
- Usually, We provide the following report:
- 3D scanning report
- Full dimensional Report
- Material test report
- Material certificate
- First article inspection report
- PSW
- PPAP
- Moldflow
- Control Plan etc


Scientific Management
Establish standardized and scientific management concepts; Formulate reasonable working methods and operating codes;
Train excellent employees with first-class skills; Improve production efficiency.

Lean Production

Quality and Efficiency
Evaluate manufacturing feasibility during the product design phase, optimize structural complexity and material selection, and ensure quality from the source.establish a precision detection feedback mechanism and correct machining deviations in real time through an online monitoring system.
Manufacturing process
Business Department - Engineering Department - Quality Department - PMC Department - Production Department - Procurement Department - Warehouse Department
1. Business Department: Receive customer orders, 2D drawings, and 3D drawings, import them into the company’s ERP system, and transfer the customer’s 2D and 3D drawings to the Engineering Department via email.
2. Engineering Department: Received customer drawings provided by the business department, changed the customer’s drawings to internal drawings of Sumint, hidden all customer information and data, converted foreign drawings to Chinese drawings, converted imperial drawings to metric drawings, and imported the converted complete drawings into Sumint servers. stay Production process manual: Determine the material specifications to be generated in the ERP system, create detailed process operation manuals, the procedures of the processing process, what equipment to use for production, how to self check the production process, what testing tools to use, draw process flow diagrams for clamping methods, surface treatment allowances, cleaning methods, burr removal, and packaging methods.
3. Quality Department: After receiving the drawings imported into the engineering server, DCC document control needs to immediately control the drawings. All dimensions on the drawings need to be numbered for easy understanding of size requirements during subsequent production and testing. ROHS will be stamped. At the same time, Zeiss 3D programs, semi-finished programs, finished programs, and shipping programs will be written according to the engineering department’s process instructions.
4. PMC department: Apply for the purchase of raw materials based on the material specifications and quantities generated by the EPR system, and forward the paper production notification to the programming team.
5. Production department programming: receive paper process and production notification, write part program Create a list of machining tools and draw a machining diagram. After completion, hand it over to the production department clerk and assign it to the relevant responsible technician.
6. Production department machine adjustment: After receiving the production instructions, the machine adjustment technicians receive the corresponding materials, conduct machine adjustment, self inspection, and send them to the quality department for inspection.
7. Quality Department: Upon receiving the parts for inspection, select appropriate testing tools for testing. After passing the testing, notify the production department for production. Each product must be sent for inspection, with a 2-hour inspection during the manufacturing process and a 2-hour DOC inspection every 2 hours.
8. Production Department: After the parts are produced, they are transferred to the burr group
9. Burr group: Upon receiving the parts, follow up with the process manual to remove burrs, clean, count, and then send them to the quality department for inspection.
10. Quality Department: Upon receiving the product parts transferred by the burr group, conduct a full size and appearance inspection on the parts, and transfer them to the warehouse department after the products are qualified.
11. Warehouse department: Follow up on the labels of the products transferred by the quality department. Finished product labels are directly stored, while semi-finished products that require surface treatment are accompanied by surface treatment drawings and sent to the surface treatment supplier. After receiving the product, it needs to be transferred to the quality department for inspection of the appearance and surface treatment film thickness of the product. All purchased raw materials need to be sent to the quality department for inspection. Only after passing the quality department’s inspection can it be stored.
12. Business Department: Follow up on the shipment date and send out the shipment details to each department.
13. Warehouse Department: Based on the shipment details provided by the business department, package according to the packaging method in the process manual, and attach production drawings, inspection reports, surface treatment reports, etc. for continuous delivery to customers.
14. When the same product is produced for the second time in our company, the engineering department needs to produce optimized processes and fixtures.
Precise Measurement
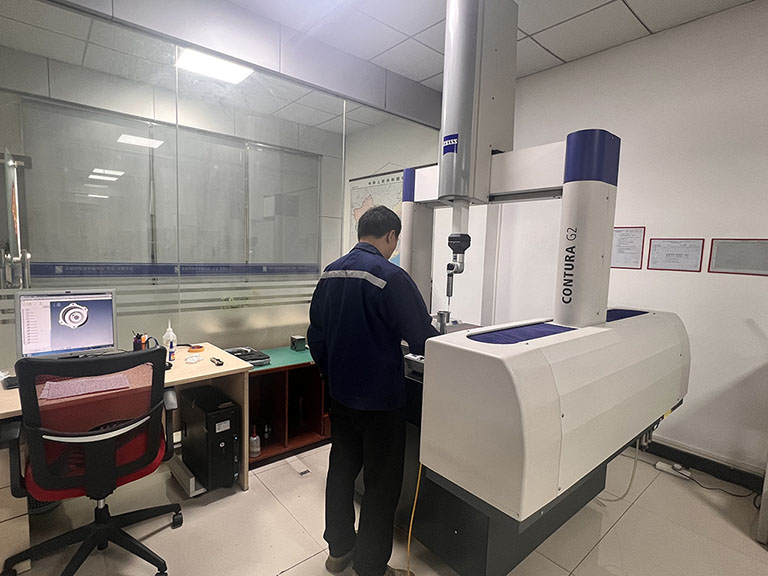
We introduced high-end testing equipment: German imported Zeiss 3D G2, Tianzhun 2.5-dimensional measuring instrument VMC432, Swiss height gauge, hardness testing instrument, roughness testing instrument, film thickness gauge testing instrument, HRC hardness testing instrument, Sanfeng outer diameter micrometer, Sanfeng inner diameter micrometer, Sanfeng vernier caliper, spiral micrometer, a large number of thread ring gauges, plug gauges, needle gauges and other testing measuring tools, 20x microscope magnifying glass, 10x microscope magnifying glass,ensure product processing accuracy, 100% qualified.


Provide demand
We can achieve your idea
